How to get paid for your bookings
Verify your identity and add the mobile money or bank account your booking money is paid into.
For vendors · 8 minutes · Updated
Before you start
- Your business is listed. If it is not yet, follow How to list your business on Edwadzi first.
- Your ID: a government-issued ID such as your Ghana Card, a passport, or your business registration certificate. A photo (JPG or PNG) or a PDF, up to 10 MB.
- The mobile money number or bank account you want to be paid into. It must be in your own name or your business name.
Steps
Open Verify your identity
Open your overview. Under “Next up” you see “Verify your identity”. Tap “Start verification”. If “Next up” shows “Complete your listing” or “Complete your profile” instead, finish that first (see How to list your business on Edwadzi), then come back here.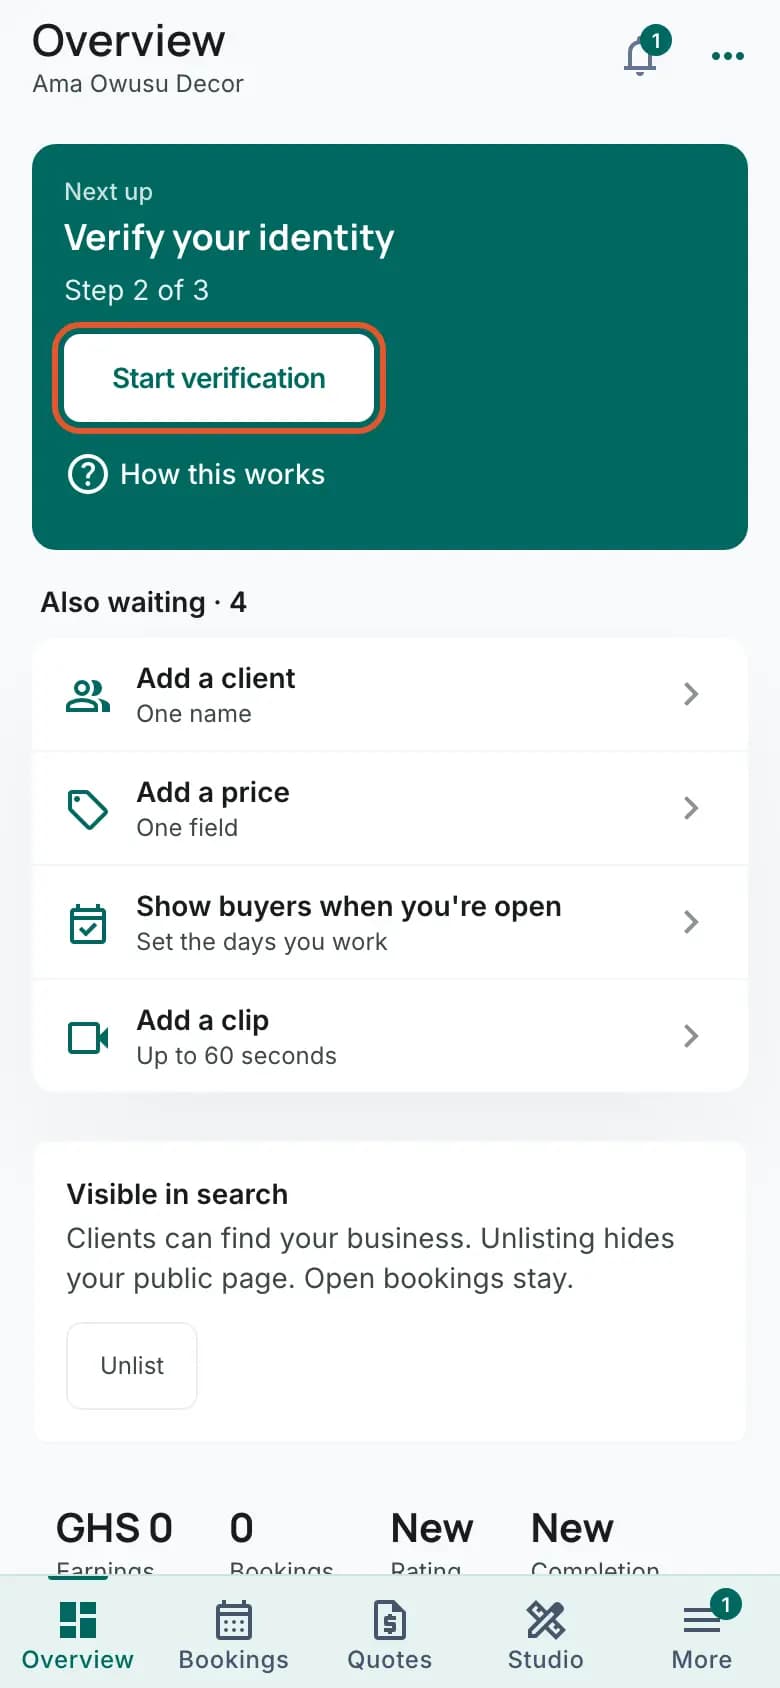
Agree to the background check
On “Get verified”, tick “I consent to a background check so I can accept bookings”. The ID upload stays locked until this box is ticked.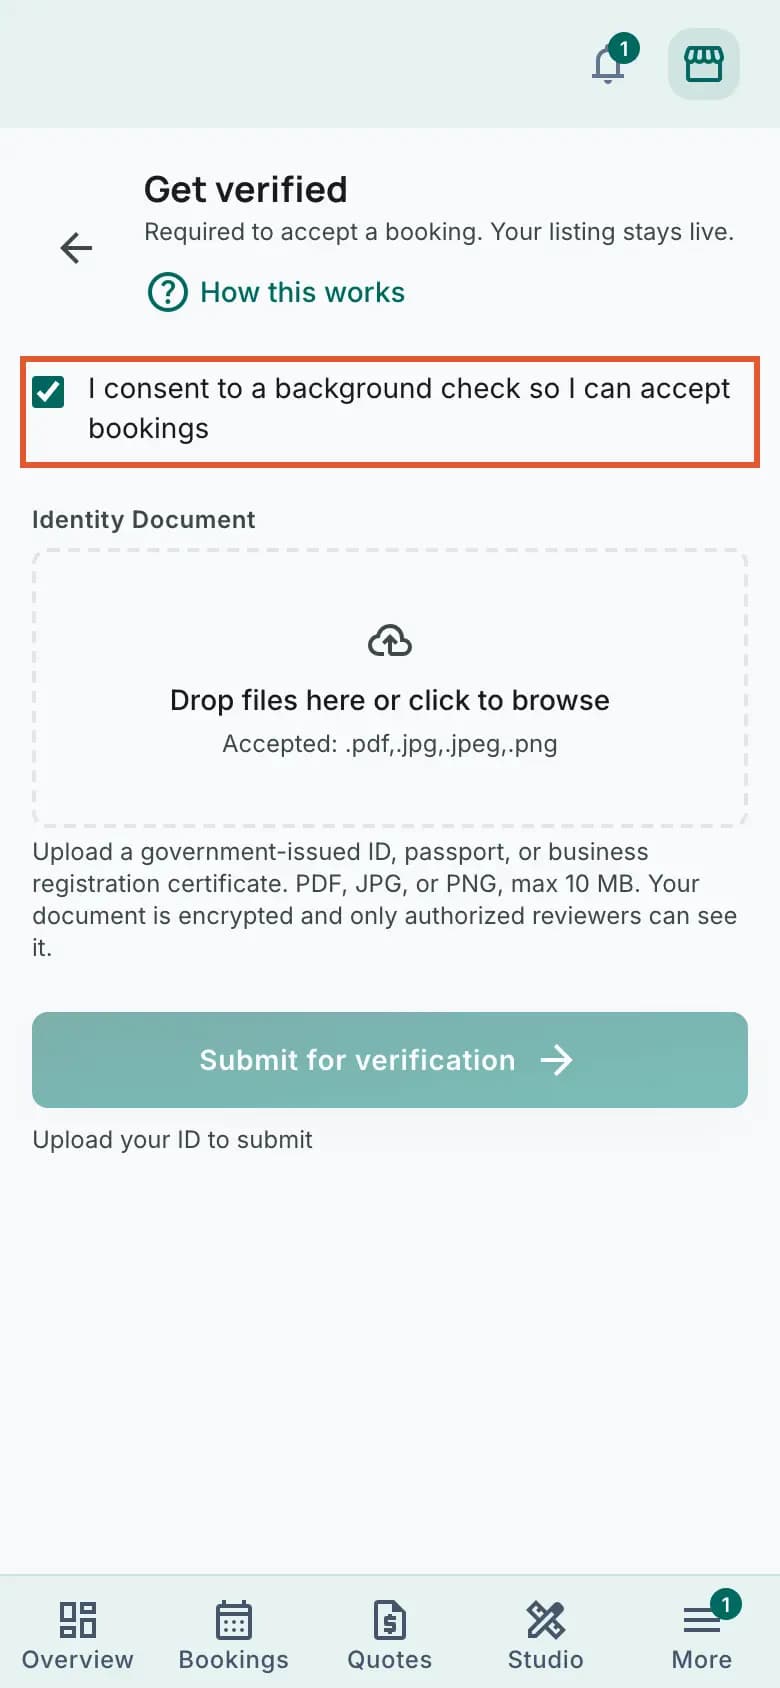
Upload your ID
Under “Identity Document”, tap “Drop files here or click to browse”. Take a photo of your ID or pick one you already have. Photograph the whole card in good light, so every line can be read.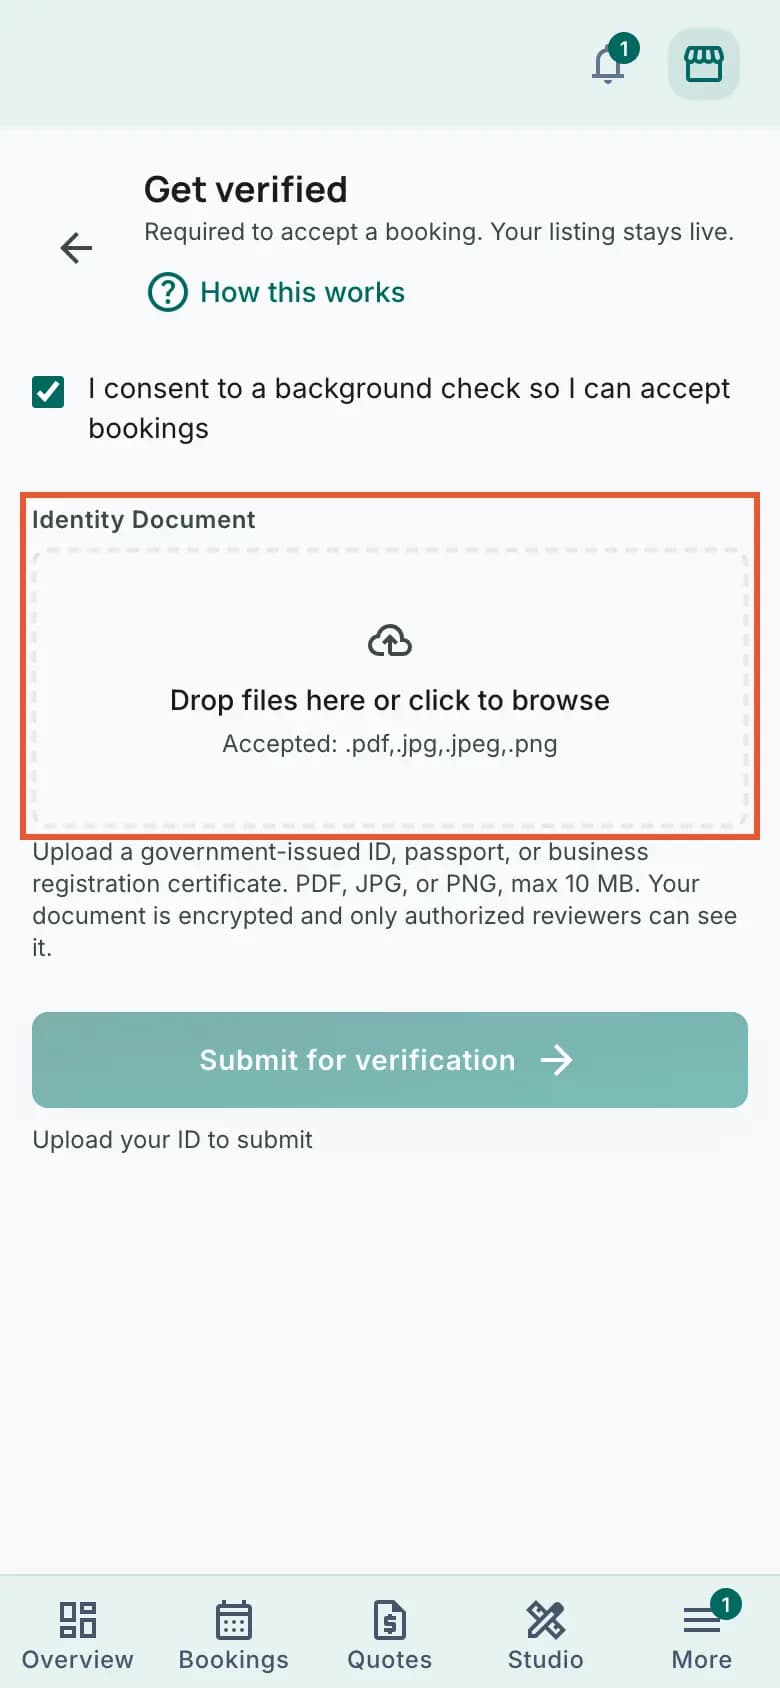
Your ID goes for review
As soon as the upload finishes, the screen changes to “Identity under review” on its own. You do not need to tap “Submit for verification”. Tap “Back to overview” (or “Continue” if you came here from a booking).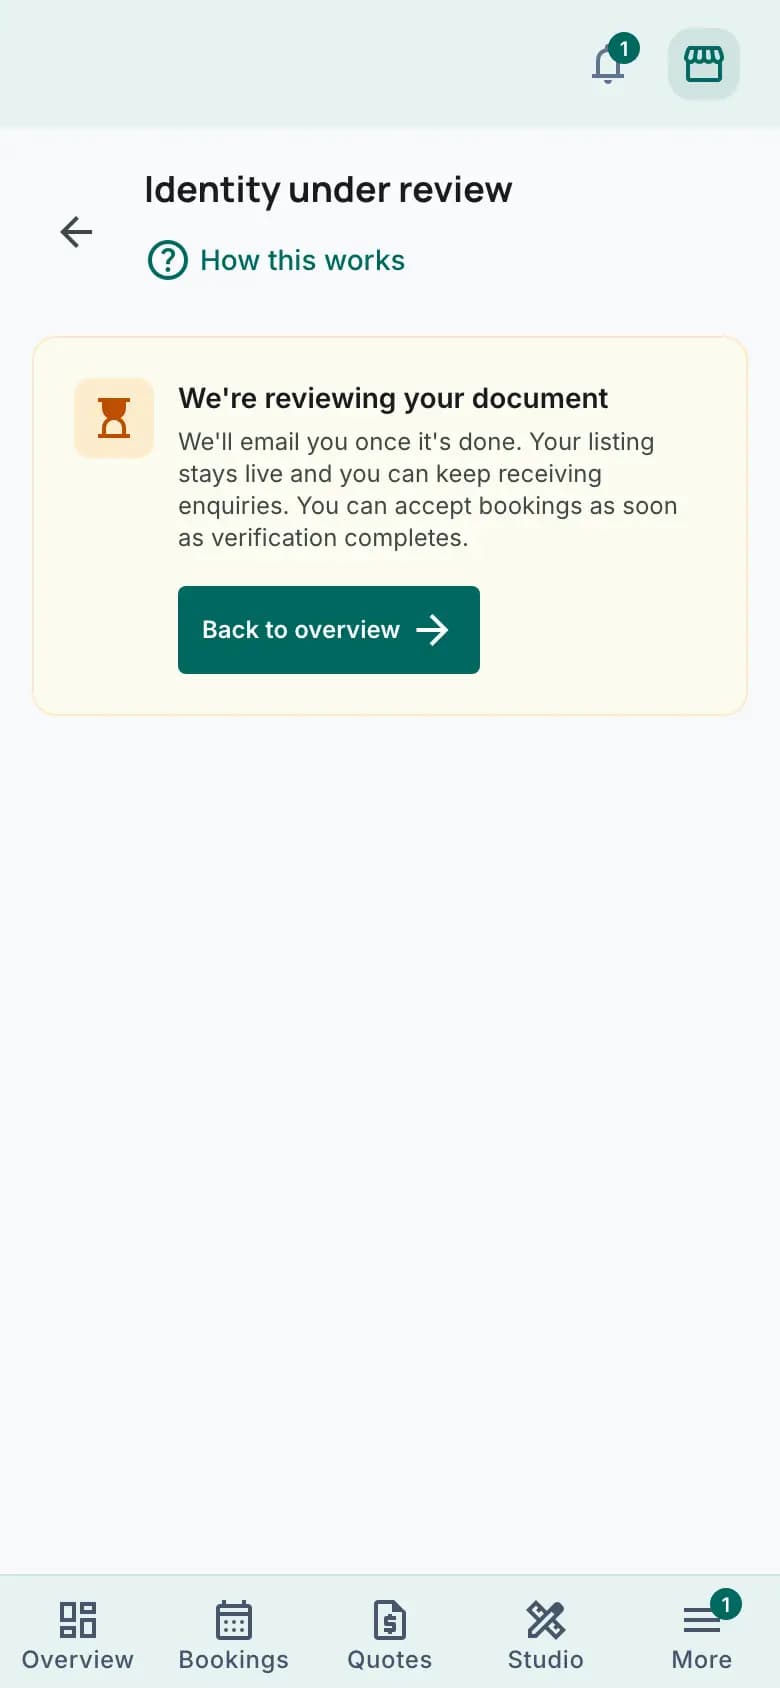
Wait for the review
Your overview now shows “Identity under review”. We review within 24 to 48 hours and email you when it is done. Your listing stays live and clients can still send you requests. You can add your payout account while you wait: open Settings, Payouts and go on from step 7.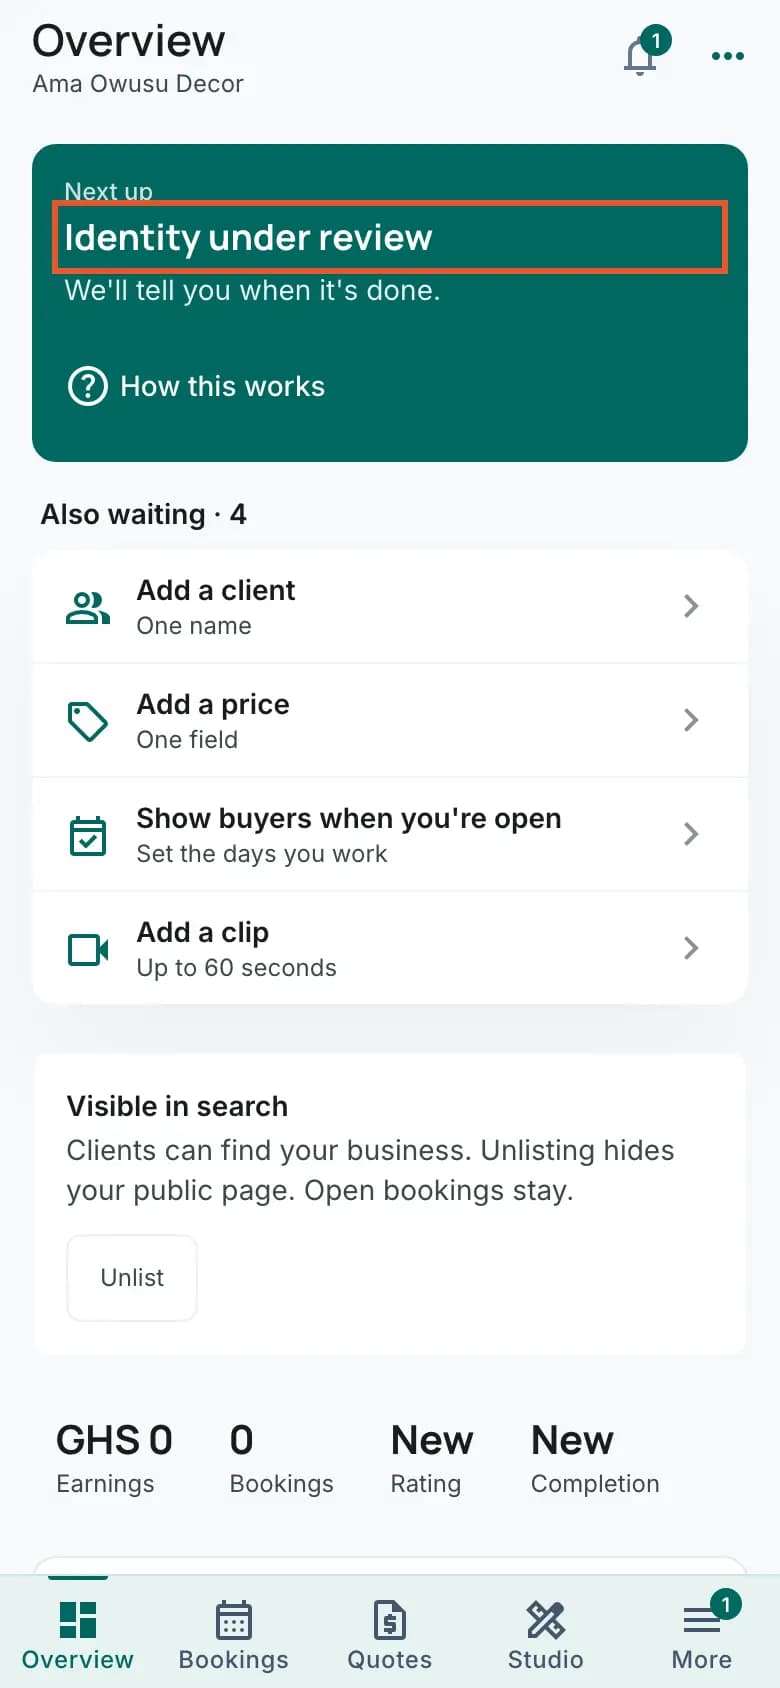
Open Add a payout account
When your identity is verified, “Next up” changes to “Add a payout account”. Tap “Set up payout”.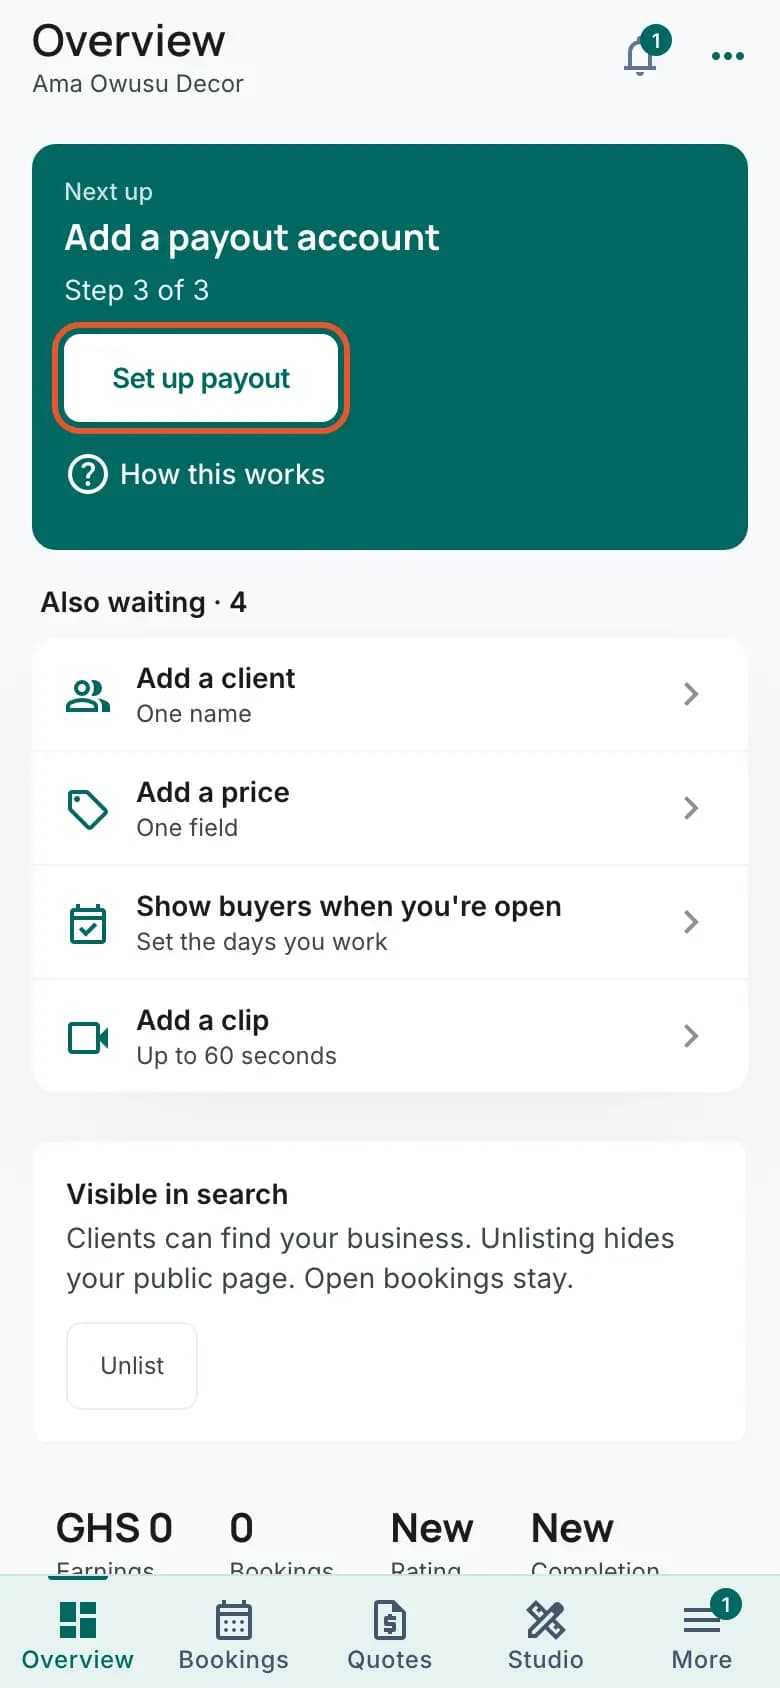
Choose mobile money or your bank, and type the number
On “Set up payouts”, tap “Bank or mobile money” and pick where you want to be paid. The list is in A to Z order and uses the networks' old names: for MTN MoMo pick “MTN”, for Telecel Cash pick “Vodafone”, for AT Money pick “AirtelTigo”. Banks are listed by their full name. Type your mobile money number or bank account number in “Account number”, then tap “Verify account”.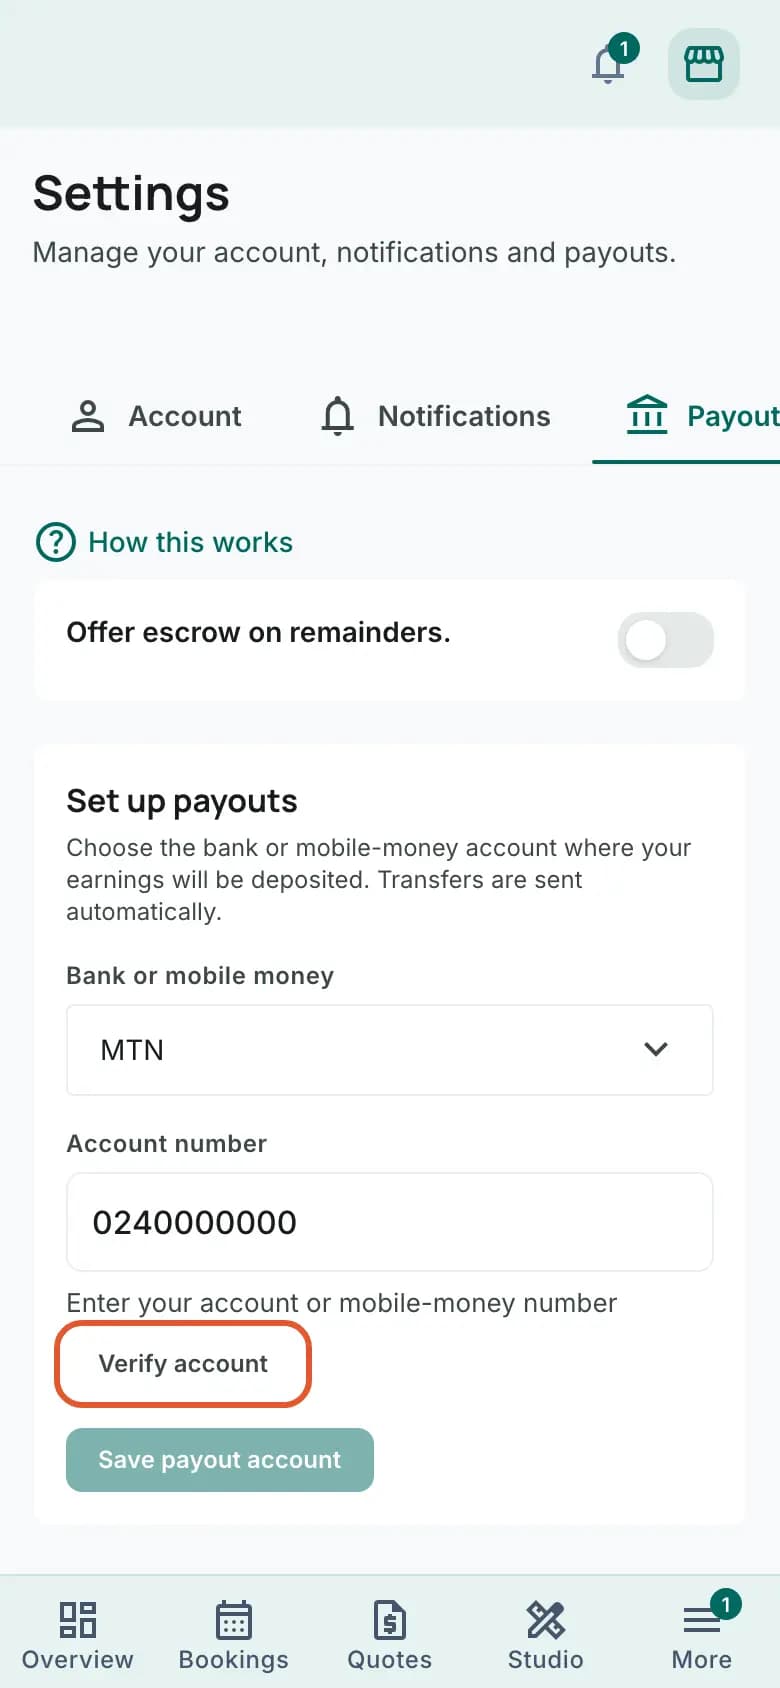
Check the name and save
The name on the account appears in a green box, with “Confirm this is your account, then save below.” If it is your name or your business name, tap “Save payout account”. The form closes and the tab shows “Payout Method” with your network or bank, the last 4 digits of the number and a green tick.
What happens next
With your identity verified and a payout account saved, you can accept bookings. When a client pays, the payment, less Edwadzi's fees and any payment processing costs, is sent to this account automatically. Some payments are held until after the event and then sent here: payments for a booking a client made before your identity was verified, and the balance of a booking where the client chose escrow. Clients can only choose escrow if you switch on “Offer escrow on remainders.”, the switch above the payout form; you can leave it off. To change the account later, open Settings, Payouts and tap “Update”.
Common problems
- “Tick the background check above to upload your ID.”
- The upload box is locked until you agree to the check. Tick “I consent to a background check so I can accept bookings” at the top, then tap the upload box again.
- “Upload failed. Please try again.”
- The file is most likely over 10 MB, or not a JPG, PNG or PDF. Take a new photo of the ID, or a screenshot of the photo, and upload that.
- “Your last ID did not pass review”
- The reason is in the email we sent you. Upload a clear, well-lit photo of the whole document with every line readable. It goes for review again.
- “We could not verify that account number with this bank. Check the number and the bank, then try again.”
- The number and the network or bank do not belong together. Check each digit, and check you picked the right network: a Telecel Cash number is under “Vodafone”, an AT Money number under “AirtelTigo”. If the number and bank are right, wait a while and try again.
- “We couldn't verify that bank account. Check the details and try again.”
- This shows when you tap “Save payout account” and the account could not be checked at that moment. Check the network or bank and the number, then tap “Verify account” and save again. If the details are right, wait a while and try again.
- “Bank account holder name does not match your name or business name.”
- The account is in someone else's name. Use a mobile money number or bank account in your own name, or in your business name as it is on your Edwadzi profile.
- “Verify account” stays grey
- Pick a network or bank first, and type the full number. The button works from 8 digits.